A free PowerShell script checks each drive’s free space against a threshold and emails an alert when space runs low. Grab the full script.
- The account running the script needs Administrators group membership on each remote computer.
- Set the execution policy with Set-ExecutionPolicy RemoteSigned before running.
- Define each ComputerName, Drive, and Threshold in the Settings.csv file; the script iterates and emails the recipients.
Part of the database and system administrator’s daily routine consists of monitoring disk usage.
It can be achieved manually, however, it is much more logical to do this automatically.
Even better – the automatic script can warn only when a specific space threshold on the specific drive has left.
In this article, we are going to share a free disk usage alert and explain how to use it, and how it works internally.
All you need to get it done is access to monitored servers and PowerShell (PS).
Prerequisites
Two important things before we begin:
- By default, the current account that will run the script must be a member of the Administrators group on the remote computer;
- The execution policy on PowerShell should be set to RemoteSigned.
To check that and change if needed, these steps should be followed:
- Open Powershell as an Administrator. To do this, click on the Start button and type “PowerShell”.
- Then right-click the mouse on Windows PowerShell ISE (simple Windows PowerShell will also work in this step), and choose Run as administrator as it is shown in Figure 1.

- When the window opens, enter Get-ExecutionPolicy and hit enter. If it is not Unrestricted or RemoteSigned, enter Set-ExecutionPolicy RemoteSigned. You will be asked if you are sure.
- Enter Y and hit Enter.
Now Powershell is ready to run the monitoring script. Let’s analyze that.
Script settings
- To begin with look at the top part of the script settings and find the path to settings.csv
$fromemail = 'SomeEmailUsedForMonitoring@ YourCompany.com'
$recipients = 'DestinationEmailAddress@ YourCompany.com' #several recipients may be separated by comma
$mailserver = 'YourCoolMailServerName.YourCompany.com'

$csv = Import-Csv 'E:\Scripts\Settings.csv' ### Read settings from file

$HTMLCollection = "<font color=""black"" face=""Arial, Verdana"" size=""3"">
Hi there, <br> This report was sent because drives listed below have less than defined percentage of free space left. <br><br>"


    foreach ( $args in $csv ) {

$DriveLetter = $args.Drive

$Collection = get-WmiObject win32_logicaldisk -ComputerName $args.ComputerName  -Filter "DeviceID='$DriveLetter'"  |

select SystemName,DeviceID,VolumeName,@{Label="TotalSize";Expression={$_.Size / 1gb -as [int] }},@{Label="FreeSize";Expression={$_.freespace / 1gb -as [int] }},@{Label="FreePercent";Expression={$_.freespace/$_.Size*100 }}

If ($Collection.FreePercent -lt $args.Threshold) {

$HTMLCollection += ('Drive <b>' + $Collection.DeviceID + '</b> on host <b>' + $args.ComputerName + '</b> has less than <b>' + $args.Threshold + '% </b> threshold of free space. <br>'  )

}
}

Send-MailMessage -From $fromemail -To $recipients -Subject "Disk Space Usage Report" -SmtpServer $mailserver -BodyAsHTML -Body $HTMLCollection -priority High
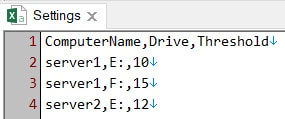
- Now open the Settings.csv file, using your favorite text editor (Notepad works fine).
- Do not edit the first row (header), just add new rows (or edit existing ones) below that contain the Computer Name, Drive, and Drive capacity threshold.
You can add as many servers and drives as you need just separate all values by a comma.
Here is an example:
ComputerName,Drive,Threshold
server1,E:,10
server1,F:,15
server2,E:,12
- Nothing else should be changed inside the script. It will automatically iterate the settings list, generate HTML text, and send it via email to the recipients’ list. An example of email message content is in Figure 4 below.

Scheduling script to run automatically
The next step would be to schedule this script so it can run automatically. This can be done at least in two ways:
- Using Task Scheduler
- Using Microsoft SQL Server Agent jobs (this requires SQL Server version, higher than Express edition, installed)
In this article, we will describe the first option.
- First, open Start, type “Task Scheduler,” and hit Enter, as shown in Figure 5.
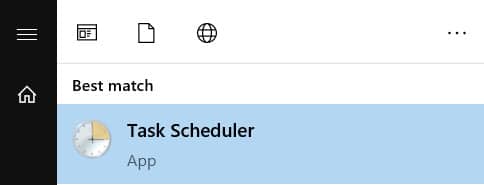
- When the Task Scheduler window opens, click the Create Task… button.
- On the General tab fill in Name, and Description, pick Run whether the user is logged on or not, and pick Run with highest privileges.
- On the Triggers tab click New, choose preferred schedule (example – Daily at 8 am), and tick the box Synchronize across time zones, click OK.
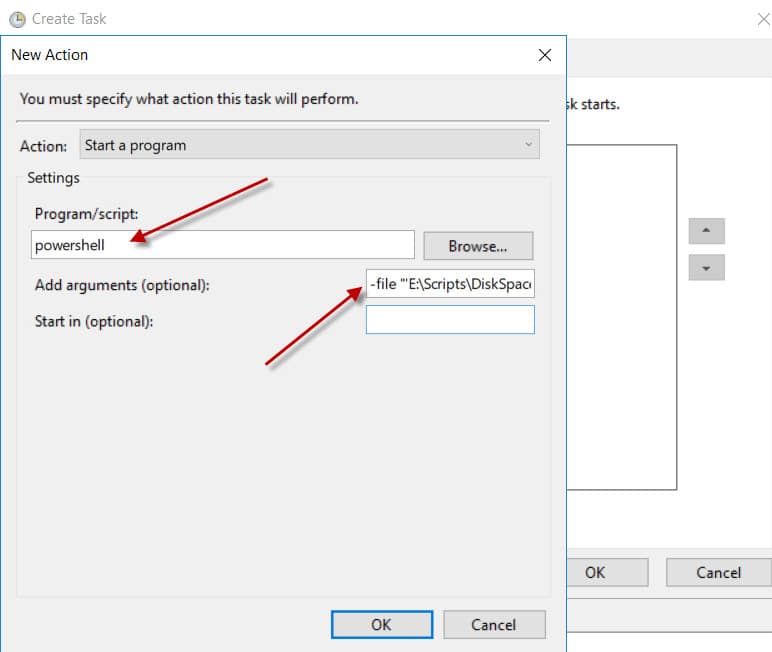
- Then go to the Actions tab, click New, and fill in Program/script by text powershell and Add arguments (optional) by –file E:\Scripts\DiskSpaceMonitoring.ps1 (change path where PS script is located at).
Example screenshot in Figure 6. - After those boxes are filled, click OK twice.
Before starting to use this script in production, we recommend setting high threshold values to ensure that no firewalls or spam filters block the emails and that all permissions are in place.
Enjoy using the disk usage monitoring alert!
Speak with a SQL Expert
In just 30 minutes, we will show you how we can eliminate your SQL Server headaches and provide operational peace of mind

